5 | Access Control
Access Control Basics
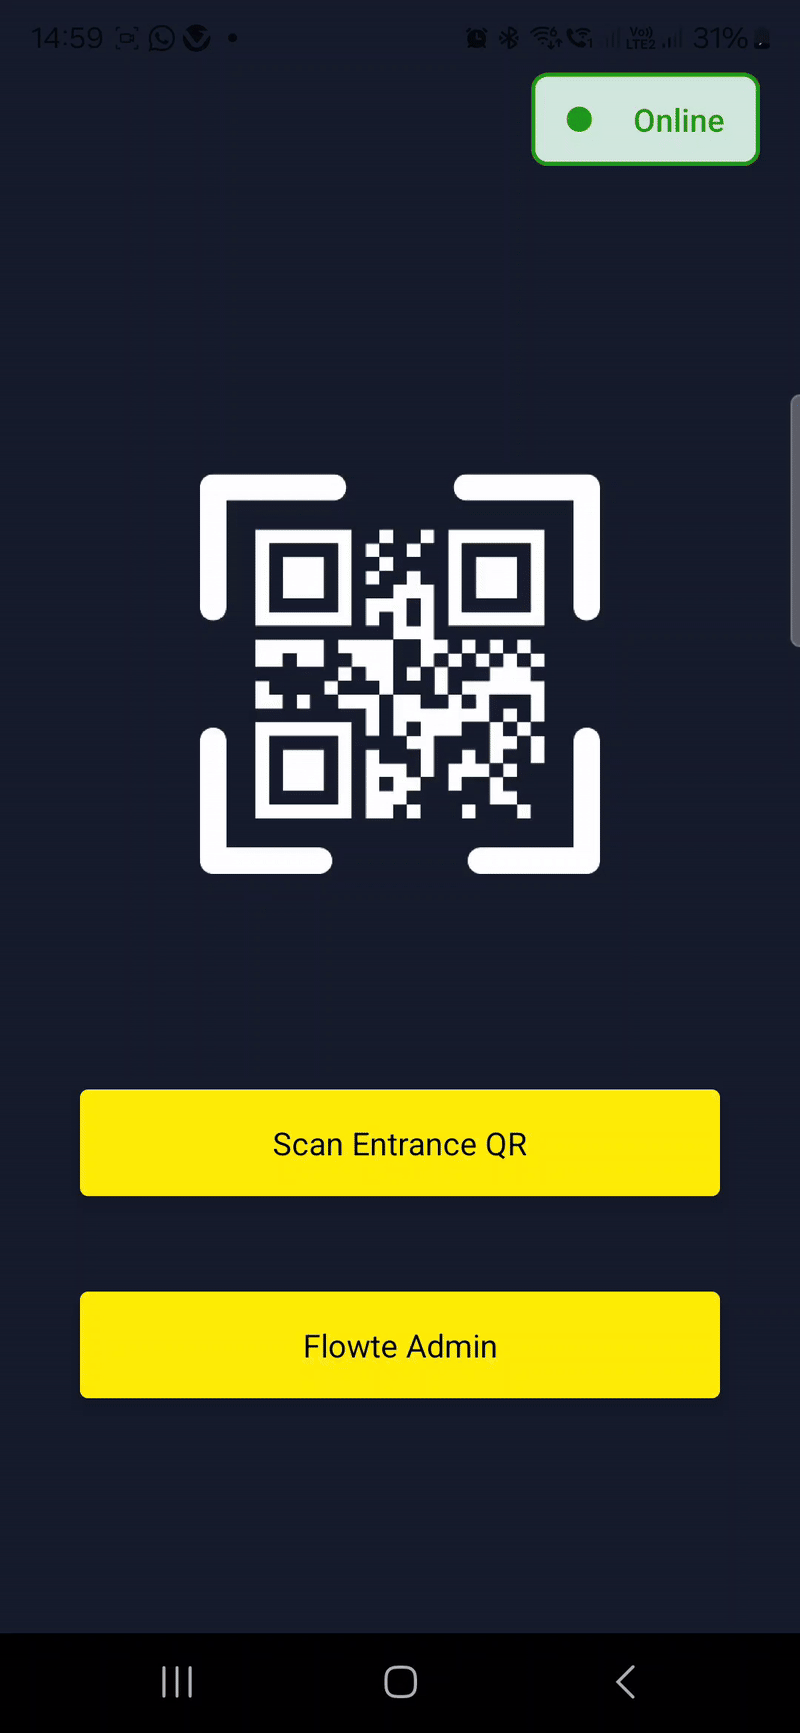
Flowte adds a QR code to every ticket issued. This QR code can be scanned via the Flowte Go App
The new Flowte Go App has the following features:
The new Flowte Go App has the following features:
Enhanced Camera Functionality
The app now offers improved camera performance for a smoother and more reliable scanning experience.
Faster QR Code Scanning
Optimized scanning speed ensures quicker processing of QR codes for seamless event check-ins.
Expanded Device Compatibility
The app now supports a wider range of device types, ensuring accessibility across more platforms.
New Login Button
Logging into Flowte is now easier than ever! You can access the login option directly from the app. Look for the "Login" button conveniently placed below the "Scan Entrance QR" button on the main screen
Step 1 | Setting up your ticket templates
To enable access control you must add a QR code to your ticket designs.
Navigate to the Ticketing > Designs. There are three types of templates that you can add.
1.Ticket Design → Printed Designs
2.E-Ticket Design → Digital Pass Designs
3.Confirmation Email Design → Receipt Design
Step 2 | Turning on access control for your bookings
- You can define what time access control will become available before and after each booking.
- Tickets can be scanned 60 minutes before your booking and until 60 minutes after the booking by default
- This can be changed by navigating Ticketing > Booking > Select Booking
- Change the "scan time" setting to any amount of time you require up to 600,000 minutes:
Step 3 | Setting entrances & rules for scanning
- You can set the maximum number of times you allow each ticket to be scanned both in total or per day:
- Navigate to Ticketing > Bookings > Select booking > Edit Times > set max scans setting for each ticket.
- Tickets from certain sections can be assigned to certain entrances in your venue as follows:
- GA entrances > edit booking > edit times > entrance menu > set entrance per section
- Seated entrances > edit booking > edit times > seat-map > select seats > entrance button > set entrance
- You can give each entrance a unique colour to help see the full picture at a glance.
- Once done, check how everything looks by clicking Entrance > View Entrance Map:
- Next, you will need to generate and print out each entrance barcode you have just given to your sections. This is done by navigating to Ticketing > Bookings > Select booking > Times and Pricing > Print Entrance Barcode:
- Make sure you use entrance barcodes to prevent non official users from using the Flowte Scanning App.

Entrance barcodes are to be printed out and handed over to the scanning operators as a safeguard in case of device related issues, in which case the scanning operator can rescan the entrance barcode and resume scanning tickets.
Step 4 | Choose your scanning method
Option A | Mobile Scanning
Link to download the Flowte Go App:
IOS:
https://apps.apple.com/gb/app/flowte-go/id6446145594
Android:
https://play.google.com/store/apps/details?id=com.flowte_scan_app&hl=en
Link to download the Flowte Go App:
IOS:
https://apps.apple.com/gb/app/flowte-go/id6446145594
Android:
https://play.google.com/store/apps/details?id=com.flowte_scan_app&hl=en
- Link the app with an entrance;
- Open the App > Scan relevant entrance barcode
- Now scan tickets > the app will only accept tickets for your entrance.
- To change entrances, simply scan the entrance barcode for your new entrance
Option B | Tethered Scanning
Step 1: Plug in your scanning device into your computer
Step 2: Click the "Tethered Device Scanning" button.
Step 3: The scanning screen will appear allowing you to begin scanning.
Step 4: Scan your first ticket by placing the QR code over the scanner.
Step 5: The details of the scanned ticket will then appear on your screen.
Step 6: Regardless of a success or failed scan. Simply repeat step 4 to scan the next ticket.
Step 5 | Scan In / Scan Out Barcode
Here you can change the scanning mode to scan out, this allows customers a re-entry option
Step 6 | Booking Venue Wifi Requirements and Testing
Mobile Router power (back up) & security
Physically Secure mobile routers
Step 7 | Booking Day On Site Operations and Preparation
All Scanners should be stored in a multi unit charging dock in a secure facility. All scanners should be fully charged and test 24 hours before they will be deployed.
All scanning devices should be signed out and signed by in post game by those individuals who will be performing ticket scanning. Once signed back in the scanners should be returned to the charging dock.
Step 8 | Agree Failed Scan Policies and Procedures
When a scan is not valid the options available are:
a. Reject and Eject these patrons
b. Send these patrons to the customer service desk for further investigation
c. Have individual scanners review the error message and make a decision on a case by case basis.
d. Ignore failed scan and allow entry and then analyse failed scans post match to check for patterns etc.
A policy decision must be taken prior to each booking day and communicated to all relevant team members
Step 9 | How to scan tickets

Point your devices' camera at the QR code. It will focus on the code after a moment.

The optimal distance is to hold the device approximately 30 centimeters from the QR code

Make sure that the QR code is centered in the screen & fit within the "target"

Wait for the code to scan. Once the QR code is centered on your iPhone's screen, it will scan immediately.
Step 10 | Scan Results Messages and Meanings
ACCEPT | If the screen turns green the ticket is valid It should be accepted | |
REJECT | If the screen turns red the ticket is invalid It should not be accepted |
Step 11 | Optimising Queue Management Guide
You will need to decide on the best queue management system for your venue. A detailed guide can be found here: https://help.flowte.com/portal/kb/articles/optimizing-queue-management
Exit Scans
- Navigate to: Ticketing > Access Control > Get App
- Flowte allows for booking goers to re-enter an booking with the use of exits scans.
- After scanning a ticket for the first time, it will enter scan in mode.
- The first exit scan performed to an already entered ticket will mark the ticket as scanned out.
- Any subsequent exit scans to an already exited ticket will return an error and a red screen.
How to scan tickets:
Benefits of exit scans
Customer Satisfaction. Customers can now re-enter booking with no problems. Efficiency. A simple ticket scan is all that is required to re-enter an booking. Data Collection. Keep track of the number of people that entered, exited an booking. Reporting. With the Flowte system you can create reports on the amount of times tickets were scanned, giving you a better understanding of your customers activities.
Scanning Result Screens
SCAN RESULT | RESULT DISPLAY | DESCRIPTION |
SUCCCESFUL SCAN | This is a valid QR code and the patron should be admitted | |
WRONG SCAN TIME | This ticket is for a different game or is scanned too early for entry to this game. | |
SCAN LIMIT REACHED | This ticket has been scanned more than the maximum number of times allowed | |
INVALID QR CODE | This ticket or barcode comes from another system and was not issued from Flowte | |
NO GAMES FOUND | This QR code is for a contact or season card. The card is a valid card however there are no games taking place at this time that are valid. | |
BLANK WHITE SCREEN | The Flowte scanning app is completely disconnected from the internet. |
Scanning Dashboards & Reports
Real Time Dashboards
Navigate to Flowte Dashboard. This allows you to quickly see a snapshot of activity in your organisation relating to ticket sales. It contains key components that will help you gain a more holistic understanding of your ticketing operations as follows:
Items Sold
This chart shows you the number of tickets sold across all games / bookings over the past 7 days. This chart is helpful to identify peaks and troughs in activity. The chart refreshes in real time.
Items Summary
This chart shows you the amount of tickets sold per game and the accepted and rejected ticket scans.
Items by Source
This chart shows you the number of tickets split between internet order and back office orders. Increasing online orders online reduces overhead saves time.
Total Revenue by Type
This chart shows tickets sold per offer type or promo code. This chart is helpful to identify which offers are effective and which ones are less popular.
Items by Type
This chart shows you the number of tickets sold per ticket type. This chart is helpful to identify which ticket types are most popular.
Revenue by Type
This chart shows you your revenue by method of payment
Entrance Details / Booking Name
This chart shows you the number of tickets sold split out by game / booking. This chart is helpful to see which bookings are performing well and which ones may need some extra promotion or sales activity.
The booking day "Live Scanning Dashboard"
Configuring bookings to show in the booking day "Live Scanning Dashboard"
Your booking will automatically become active and visible in the Live Scanning Dashboard once it arrives into the 'Scan Start' timeframe you have given it in your booking settings:
Once the Scan Start time is active, your booking will become visible in the Live Scanning Dashboard:
Live Scan Data
Navigate to Ticketing > Access Control > Live Scanning Dashboard. The top chart displays a snapshot of you scanning activity from the last one minute:
The charts below display overall scanning activity for today and accepted and rejected scans per minute:
The table below will display all bookings that currently have open scan windows:
Finally, the table below will display all rejected scans, the turnstile/scanner they got rejected by, and the timestamp of the rejected scan:
Scanning Reports
Navigate to Analytics > Detail Report
This report allows you to generate a detailed report of those who scanned their tickets, those who didn't scan their tickets and also see the cause of any failed scans. Before you generate the report please select the following options:
Enter the Transaction Date or Booking Time Date filter you require the report for. Filters > Select All > click confirm > Now click Update
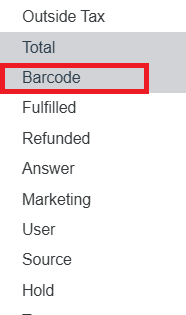
When the results load click on the column visibility button > select "scans", "Entrance", "barcode" and "area" (you may need to uncheck some of the preselected columns to make room for these columns depending on your screen size! The output you see will be similar to that show in the image below
Exporting Barcodes
Navigate to Analytics > Orders Report>Column Visibility>Barcode
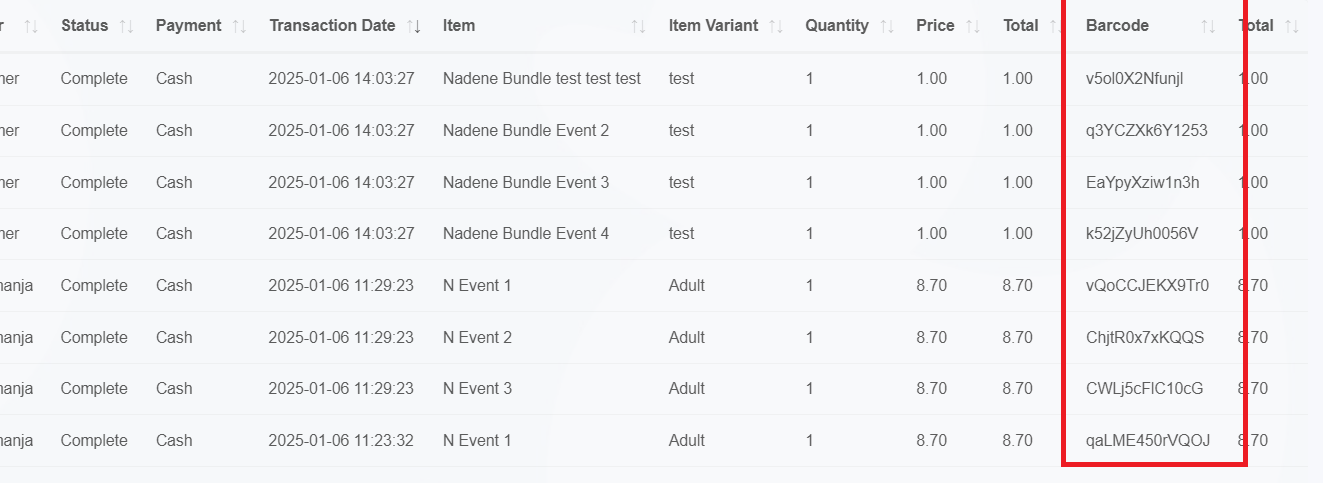
This report allows you to generate a list of QR codes to export and print via an external printer or alternative barcode system. Once your list is on screen click the csv or excel button above the report to save the file.
This file can then be saved and sent to the appropriate third party. When printing the external barcodes the barcode number must be appended by the following url to convert it into a scannable QR code: You should replace where it says QR CODE with the number of your QR code in the report
Audiences
With Flowte's audience builder you can create groups of contacts based on the criteria you choose (including their scanning results). You can forward emails automatically to group you choose. This gives you an easy way to contact your customers because you don't need to remember everyone's individual email address.
Navigate to Fan Engagement> Audiences > Add Audience
Filters:
You can filter your contacts using a wide range of filters to make your list as precise as possible.
Transaction date. Filter using a specific transaction time.
Booking Time. Choose contacts from a chosen booking time.
Contact tags. Create an audience list using contact tags.
Booking Tags. Create an audience list using contact tags.
Exclude Lists. If you had created previous lists you can choose to exclude this lists.
Products. Create audience lists using contacts that have bought a product.
Tickets. Create audience lists using contacts that have bought a product.
Ticket Tags. Create an audience list using tickets.
Marketing. Select whether to include contacts that have opted in or out of marketing
No. of Orders. If contacts have a made a certain amount of orders you can choose to add them int your list.
Scanned. Choose if the contact should have scanned or not scanned their ticket
Date: Specify if the user should have a particular date field such eg their birthday to be included in the list
Campaign: Choose from a list of your campaigns that was sent out
Show active inactive buttons:
By using the "Show Inactive/Active button" You are able to create lists on active and inactive bookings and products.
After you have set your criteria. Click generate audience. Flowte will tell you how many contacts were found using your criteria.
Save your audience list by inputing the list name and clicking "Save Audience" .
Create a Mailing and Postal Address List
You also have the option to download the list as a CSV file. If you import the file as a csv, the file will also contain the address information for all of the contacts in your audience list
Season Tickets and the Live Scanning Dashboard
Your season package will automatically be included in any live scanning data displayed in the Live Scanning Dashboard, as long as the booking currently happening is included into the season pack. All season ticket holders that have the individual bookings currently active in the live scanning window included in their packages will also be recorded in the dashboard.
Scanning App Use Cases Flows
QR Codes Summary
- When assigning an Entrance to a number of seats (in a seated area) or to an entire Area (in a GA), That combination of the area/seat + Entrance creates a unique QR code that can be scanned to authenticate the scanning operator and download the tickets sold from seats assigned to that particular entrance.
- Each performance will now have a general QR code that the staff member can use to also authenticate and then download the tickets sold from unassigned areas.
Quick Note: From a design perspective, I’ve vertically centred the QR code.
Let's Start
Below are the scenarios possible and which tickets under each set of variables.
Scenario 1:
- We have a seated arena with 3 sections and 10 seats each.
The staff member takes the following actions:
- The staff member doesn’t assign any entrances to any seats.
Results:
That performance will now have 1 QR codes to use, called:
1 - “Default Entrance”
Let’s answer this question:
What tickets will be downloaded when scanning the “Default Entrance” QR code?
- When scanning the “Default Entrance” QR code, All sold tickets will be downloaded, as the staff member has assigned no seats to any entrances.
Scenario 2:
- We have a Seated Arena with 4 sections and 40 Seats each.
The staff member takes the following actions:
- Takes 10 seats each from 4 of the 4 sections and assigns them to an entrance named “North Entrance”.
- Takes another 10 seats from each of the 4 sections and assigns them to another entrance named “West Entrance”.
- The staff member does not assign any entrances to the other 20 seats of the 4 sections.
Results:
That performance will now have 3 QR codes to use, called:
1 - “Default Entrance” QR code.
2 - “North Entrance” QR code.
3 - “West Entrance” QR code.
Let’s answer this question:
What tickets are to be downloaded when scanning each of the 3 QR codes?
- When scanning the “Default Entrance” QR code, all sold tickets from seats that are not assigned to the “North Entrance” nor assigned to “West Entrance” will be downloaded.
- When scanning “North Entrance” QR code, tickets from seats that were assigned to “West Entrance” and tickets from seats that were assigned to no entrances will be downloaded as those can enter from anywhere.
- When scanning "West Entrance" QR code, seats that were assigned to “West Entrance” and seats that were assigned to no entrances will be downloaded as those can enter from anywhere.
Scenario 3:
- We have an booking linked to a GA venue with 3 sections named Area 1, Area 2, VIP and 100 seats each.
The staff member takes the following actions:
- The staff member doesn’t assign any entrances to any seats.
Results:
Again: That performance will now have 1 QR codes to use, called:
1 - “Default Entrance” QR code.
Let’s answer this question:
What tickets are to be downloaded when scanning the “General Entrance” QR code?
- When scanning the “General Entrance” QR code, any ticket sold from any of the three sections will be downloaded using the “General Entrance” QR code.
Scenario 4:
- We have another booking linked to a GA venue with 3 sections named Area 1, Area 2, VIP and each of those sections has 100 seats each.
The staff member takes the following actions:
- The staff member assign an entrance named “Side Door” To Area 1.
- The staff member does not assign any of the other two sections (Area 2, VIP) to any entrances.
Results:
That performance will now have 2 QR codes to use, called:
1 - “General Entrance” QR code
2 - “Side Door” QR code
Let’s answer this question:
What tickets are to be downloaded when scanning each of the 2 QR codes?
- When scanning “Side Door” QR code; any tickets from seats sold from Area 1 will be downloaded alongside any tickets sold from Area 2 and VIP, because those are not assigned to any entrances and can therefore enter from anywhere.
- When scanning General Entrance; tickets sold from Area 2, and VIP will be downloaded but not tickets sold from Area 1 as those have been assigned a specific entrance (Side door Entrance) and out of the “General Entrance” pool.
Scenario 5:
- We have a similar booking linked to a GA venue with 3 sections named Area 1, Area 2, VIP and 100 seats each.
The staff member takes the following actions:
- The staff member assigns more than one entrance to Area 1, (2 in this case, entrances named: “Right Door”, and “Left Door”)
- The staff member assigns VIP Area to “Backdoor Entrance” and leaves Area 2 without any entrances.
Results:
That performance will now have 3 QR codes to use, called:
1 - “Right Door” QR code.
2 - “Left Door” QR code.
— Both assigned to Area 1
3 - “Backdoor” QR code.
— Assigned to VIP Area.
Let’s answer this question:
What tickets are to be downloaded when scanning each of the 2 QR codes?
- When the scanning operator assigned to the “Right door” entrance scans it’s QR code, they will get a list of tickets sold from Area 1 alongside tickets sold from Area 2 as those are not assigned to any entrance, but not tickets sold from VIP Area as those have been assigned an entrance.
- When the scanning operator assigned to the “Left door” entrance scans it’s QR code, they will also get a list of tickets sold from Area 1 alongside tickets sold from Area 2 as those are not assigned to any entrances, but not tickets sold from VIP Area as those have been assigned an entrance (“Backdoor Entrance”).
- When the scanning operator assigned to the “Backdoor Entrance” scans its QR code, he will get a list of tickets sold from VIP Area alongside tickets sold from Area 2 as that area hasn’t been assigned an entrance and ticket holders can enter from anywhere.