4 | Storefront
Storefront Sales
Navigate to Storefront
The storefront can be used to take telephone or face-to-face orders from your customers. It is possible process any combination of product types in a single sale.
Cart Button: This button can be clicked when you have finished adding items to your basket.
Clear Button: If you wish to cancel your current cart and remove all items you can click the clear button

Search: To the right of the clear button there is a search filter that allows you to quickly find what you are looking for by typing in the name of the item you need.

Sort: You can sort items in the storefront by name or date using the sort filter

Processing a Product
Please note: when a product is added to the Shopping Cart a sales timer of 60 minutes will begin. It is visible in the bottom right hand corner of your screen.
This timer prevents products being reserved unintentionally for an extended amount of time, leaving them open for other customers to purchase.
The timer can be reset by selecting the red 'Clear' button and beginning the sale again.
Selecting A Product
In Storefront - click on the Product you wish to process a sale for.
You will be shown all available stock for the product. Select the items you require.
You may select 'Add To Cart' if you wish to add other items to the cart or select 'Add To Cart & Checkout' You will be taken directly to the checkout.
Checkout
By default the system will show a single line Order Summary of all the items you have selected in your cart and the total price to pay (this will include any discounts; item fees and delivery fees).You can click on Show Order Summary at any time to view each of the items in your order
If multiple delivery options are available you can choose the delivery method for your order by selecting Choose Delivery Method
Opening the Order Summary will give you the option of changing the delivery method for individual items, if required.
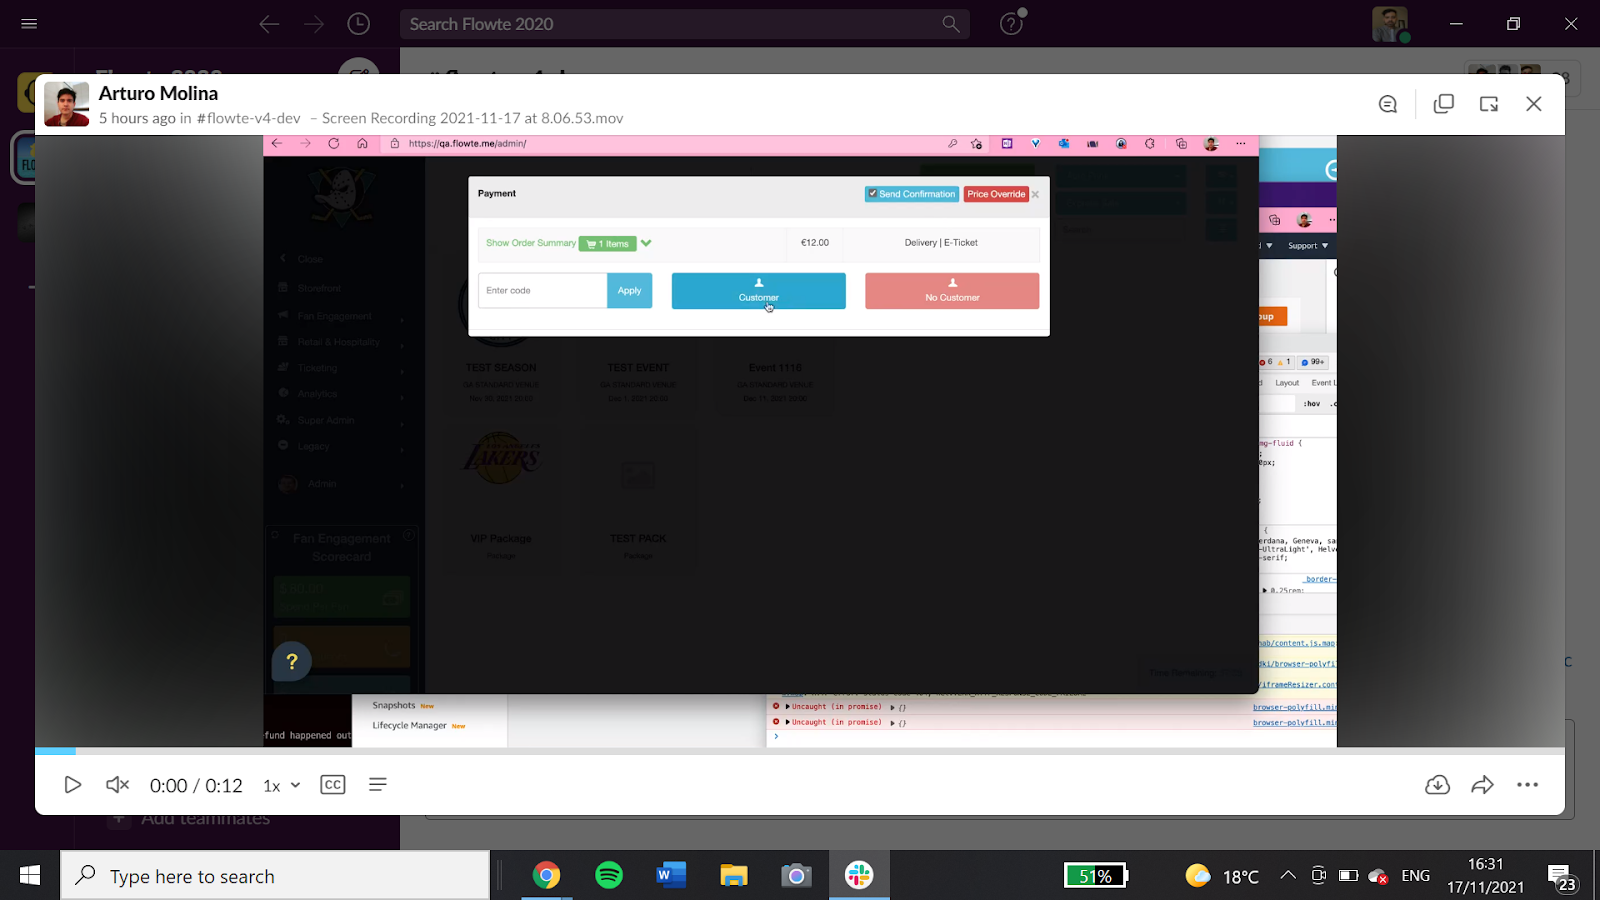
No Customer - Selecting this indicates the customer is not a Contact and will not become a Contact. Clicking this will bring you to the payment method options and the transaction will be finished.
Customer - Clicking this will allow you to attach a Contact to the transaction. You can search for a contact using First / Last Name, Email Address, or Phone Number.
If the Contact is not present, you may Add New Contact using the button provided. NOTE: any details added in the search fields will autofill in the New Contact screen
To select the contact for the transaction, click the yellow 'Select' button. If you wish to edit a Contacts details click the yellow 'Edit' button.
You will then be brought to the payment options menu.
Held Tickets
General Admission Holds
- When processing GA tickets for an event with held tickets you can sell either held or open tickets
- Users can choose choose to sell from the available open tickets, or from a specific hold
- This feature gives more control over your Holds.
- See above: Hold 1 has 25 tickets >If you sell 3 tickets from this hold only 22 held seats will remain.
Seated Holds
- Selling a held ticket to a seated venue is identical to selling a non held ticket.
- Held seats which are highlighted in different colours (defined by user)
- See above: Nine seats colored blue have been held.
- To sell one of these seats select it as normal and click Add to Cart.
Order Management
Refund Options
Standard Refund or Reprint (system admins only)
This is a standard refund which will return funds to the original method of payment
For example, if the transaction was paid by card, this will return funds to card; if this
was a cash transaction, the transaction will be recorded as refunded in the system
and you will need to issue a cash refund of the physical monies.
1. Log in to Flowte
2. Navigate to Fan Engagement> Contacts
3. Search for the contact who needs a refund or reprint.
4. Click on the contact you wish to refund or preprint tickets for.
5. Click the green "refund transaction" or "Print Items" should you need to reprint and order.
Express Refund or Reprint (available to all agents)
After an order has been completed you can always quickly reprint an order as follows:
1. On the point of sale page in bottom right hand side of screen you will see a "last order" information box.
2. Click on the "last order" box.
3. Click the green "refund transaction" or "print items" as needed.
Refund to Other
This feature is used when you are unable to process to a refund to a credit card that has expired. You will need to arrange an alternative method in order for your customers to receive funds via check, cash, etc. By selecting refund to other the transaction is subsequently recorded on your Flowte account. This feature is beneficial to you as you are able to process the refund and report on it also.
Below are steps on how to refund to other.
1. Search for the contact. There are two ways to do so:
a. Search for contact: Navigate to Fan Engagement > Contacts > Select the transaction.
b. Search using the transaction number:Fan Engagement > Contacts >Transaction Search > Input the transaction number.
2. Refund the transaction.
a. In the top right hand corner of the screen select the red "Refund Transaction" button.
b. From the options select Refund to Other.
Refund to Hold
This is used to refund a transaction to the original method of payment (as with the standard 'Refund' option outlined above), however in this instance the seat / seats will simultaneously have a hold applied. This means the seat will not be available for sale online, but will be available for sale via the back office and will show as a different colour on the seatmap. Select the the hold you would like and click Refund.
Methods of Payment (MOP)
- Flowte accepts multiple payment options, also making it easier for you to manage your payments
- When you click on 'Customer' or 'No Customer' you get the following MOP options.
Cash: For payments made with cash.
Card: For payments made with card over the phone.
Card Reader: For payments where the customer is present. The card reader is faster & easier then "card".
Other: Used for alternative payment methods. This is commonly used for payment via cheque or bank transfer.
Gift Voucher / Certificate: Gift voucher can be accepted in storefront via the "other" mop.
Price Override
Process the sale as normal until you get to checkout. Select price override in the top right hand corner.
The following page will appear. Here you can:
1. Remove item fees.
2. Remove Transaction fees.
3. Update item price. To update item price input the amount you'd like and click the "Update Item Price" button.
Reservations & Invoices
Reservations are used for orders which will be paid in the future with no payment taken at point of purchase.

NB: If you untick "Send Email Confirmation" customers will not receive tickets until payment is made.
Creating Invoices.
If you need to send an invoice to customers whose tickets are reserved you can design an invoice for them by navigating to Admin > Preferences >Tickets> Add Confimration Email. Here you can deign and save your invoice template.
To activate the invoice template navigate to Admin > Settings > Reserved Email Template. Here you can choose your template and then click "Save Storefront Settings" Once a reservation template has been applied this will be automatically sent to your customers anytime you select reservation as the method of payment when taking storefront orders.
Creating a reservation
1. Go through the usual sales steps
2. Be sure to select 'Customer' and enter the contact details, connecting the reservation to a customer
3. Select the "Reservations" MOP at checkout. The contact will be sent an email & link to pay online
4. The transaction will now have a 'Pay Reservation' button on the TR page (image below)
5. This will give you the option to mark it as paid by cash, card reader, or card.
Exchanges
If a customer wants to exchange their ticket you can easily do so with the exchange feature. This feature is beneficial to you and your customers because you are able to exchange a ticket for another one in your organisation. To perform an exchange the order value must match the original order value.
1. Navigate to Fan Engagement> Contacts > Search for the contact that requires the exchange.
2. Using the transaction table, select the transaction you want to exchange.
3. On the transaction page click "Exchange Transaction" button. Select Exchange Transaction.
4. The point of sale will be shown > purchase a new item > ensure order value matches the original order.
5. Select finalise and your exchange is complete.
Gift Cards / Vouchers / Certificates
- Customer can use a gift card to pay for their order Flowte accept 3rd party vouchers or Flowte vouchers.
- To apply a gift voucher payment against an order follow the steps below as shown in the image
- In this example a €20 voucher being applied against a €40 order.
Step 1: Click Price Override.
Step 2: In the price box deduct the voucher amount.
Step 3: Enter the voucher number in the order note / voucher number input box (as shown above).
Step 4: Click "Update Item Price".
Step 5: Finish the order as normal.
Fulfilment & Batch Printing
This app allows you to batch or bulk print any orders received via the Storefront.
Navigate to Analytics> Shipping
To begin select a date range for the orders you want to have displayed.
Using the 'Select Date' dropdown menu you can choose a pre-defined date ranges or choose a "custom date range". Selecting any option (except Custom Date) will automatically refresh the report to display any data matching this range.
Selecting Custom Date will enable the date picker function. To choose a beginning and end date for your report click in the text field to open the calendar and select the date by clicking it.
Specify the start & end date for your report click the green Update button on the right side of your screen to generate the report.
Use the Filters to further narrow your search
Order Fulfilment
- Example: You wish to print all orders, which were marked for Express Delivery procssed in the last 7 days
- Click the Filters button.
- Specify 'This Week' from the dropdown Transaction Date filter.
- Specify box office collection from the Delivery method drop down.
- Select only non fulfilled orders by selecting "No" from the “Fulfilled” menu option.
- Click Update > This displays all your items. If you are happy with this list, click 'Print Listed Tickets'.
- After printing you will be asked to confirm that the orders printed successfully?
- Clicking yes marks these orders as fulfilled This avoids any double printing of orders.
Search, Columns, and Export
- Using the search bar you can search for a specific entry by name. The list will update as you type.
- The 'Column Visibility' menu lets you add or remove columns.
- Your list of orders may be exported in CSV, PDF & Excel format by clicking the relevant button.
- Clicking the print button will take you to a 'Print Preview' where you can print the report
- The entries dropdown (shown below) allows you to see 10, 25, 50, and 100 entries per page.
Scan and Sell
When a customer is buying a merchandise item, for example, you can quickly look up their account by scanning their season card (which uses the contact QR code). This will make the process faster at the venues, as opposed to having to manually type in and search for customer details.
This new feature lets you scan season passes to obtain customer details and links them to the current transaction.
Benefits:
- All purchases are linked to the customer
- It saves time for operators
- It gives loyalty points or benefits (if applicable to the fan)
- It gives your company better analytical info about customers
- More opportunities for Upsell.
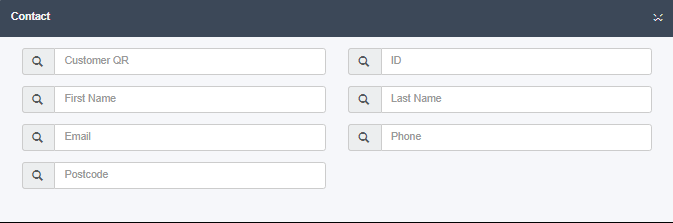
How to use it:
You can test this by typing in the code from the contact card in this new field and you should find the customer record.
Once you have the scanner, it will automatically fill in this field.
Go to customer
Scan the pass

Once you scan the pass it will show you the customer. Simply select it.
Cart Timer
When you first open the storefront a Cart Timer will be shown in the bottom right of the screen. This will count down from 60 minutes after each sale or refresh of the Storefront.
When this timer reaches 00:00 the current cart will be abandoned and a new cart will be opened. The user will see an alert showing this.
The Cart Timer is relevant to the operator if Flowte has been left unattended for some time, in this case the operator should check the cart time upon their return and refresh the page if required.
A number of new features have been made available to make the system easier to use for back-office operators; and to speed the process of making sales. These can be found in the top right of the menu bar:
1 | Express Sale
There is a dropdown in the storefront called Express Sale, this will list all active items in the storefront.
If you choose an item from the dropdown menu, all sales will automatically loop back into this item. This feature is specifically for quick sales.
You may choose to select any other item in the Storefront to add to a cart; once added the screen will auto refresh to the item defined under Express Sale.
To turn off Express Sale just select 'No Express Sale' from the dropdown
How to use express sales
At times where you will have a lot of sales happening in quick succession on the day of an item, it may be better to switch to "express sale".
1. At the top of the storefront you have a dropdown called "Express Sale", click it
2. You will see a list of all options currently available to loop.
3. Select the item / booking from the menu that you wish to use for Express Sale.
4. Now Make a sale for that same booking
4. After each sale, you will be looped back to the same booking and section, saving time
5. When you want to stop the express sale, click on the dropdown again and select "No Express Sale": This works well in conjunction with "Auto Print" to help you get through busy sales periods easily.
Processing an express sale (Seated)
1. Select the booking
2. Select your seats and click add to cart and checkout.
3. You are brought straight to the finalise page, adding customer details is now disabled.
4. Choose your method of payment and process the transaction.
Processing an express sale (General Admission)
1. Select the booking
2. Select your ticket type and quantity.
3. You are brought straight to the finalise page, adding customer details is now disabled.
4. Choose your method of payment and process the transaction.