4 | Customer Profiles
Managing Customer Profiles
Add a contact
1. Go to Fan Engagement > Contacts > Add Contact.
2. Enter the contact details.
3. Click Add Contact.
The Contacts details page
Once you have created a contact, you can view the details of the contact in the record's details page.
Here you can see: transactions, their contact info, tags, files and so on - in a single location.
To view the contacts details page:
1. Go to Fan Engagement > Contacts.
2. Click the name of the desired account
3. You will see the details page of the contact.
Here is a quick-tour of the Contact's details page:
Launching a sale with the Storefront button
The storefront button brings you to your storefront. Here you can select which booking or product to purchase. The contact will automatically be assigned to this purchase meaning you do not have to input their contact information during the sales process.
Contact Info:
Here you are able to edit the contact's:
1. Name.
2. Email address.
3. Phone.
4. Add a note.
5. Add a custom tag.
6. Edit their marketing preference.
You see the contact's total spend at a glance.
Transactions:
In this section you are able to:
1. View customer transactions.
2. Resend confirmations.
3. Print contact card.
4. Change the contact associated with an order.
Addresses and Files:
1. Add, view and edit the contact's addresses.
2. Upload files against the contact record.
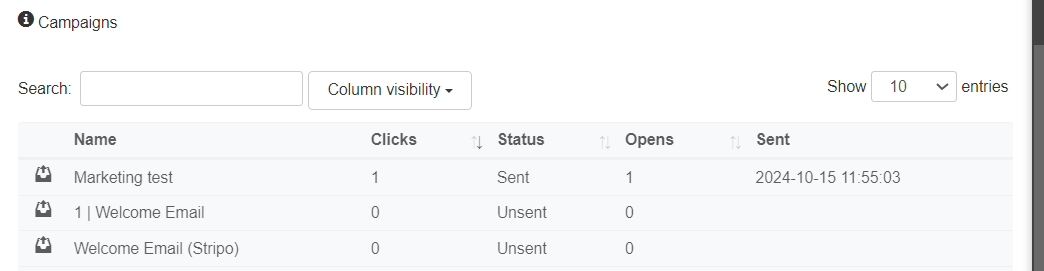
Campaigns:
You can now see campaigns that was previously sent to a customer under their customer profile.
Merge & Purge Contacts
You can edit & delete duplicate contacts to help keep your contact database organised.
Step 1: Find Duplicate Contacts
1. Go to Fan Engagement > Contacts.
2. Review your database for any duplicates.
Step 2: Move Transactions To Correct Contact:
1. Combine orders into one record.
2. Go to Fan Engagement > Contacts > Edit
3. Select a transaction.
4. Your transaction will appear.
5. In the top right hand corner select Change Contact. Select the contact you want to move the transactions to.
6. Search for the contact you want to move the transaction into.
7. Click the edit button beside the contact you you want to move the transaction to.
8. Click Save Contact.
Step 3: Removing the "old / legacy" contact
1. Select the duplicate contacts.
2. Click the blue Edit button on the contact. The following page will appear.
3. In the top left hand corner, click the red Remove button.
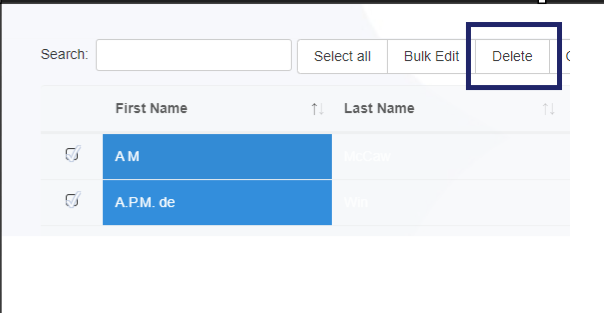
Bulk delete contacts:
Fan Engagement>Contacts
Select the contact(s) that you want to delete and click on ''delete''
Fan Engagement>Contacts
Select the contact(s) that you want to delete and click on ''delete''
Step 4: (optional) Cleaning up contacts with poor quality data
You can also make edits to contact records on the contact information page > click save when complete
Flowte Wallet App
- Flowte Wallet allows you to review tickets purchased from Flowte
- The tickets will intelligently update with any changes to your order or booking information.
- Using the app there is no need to print tickets or bring identification for collection of tickets.
- Simply show your tickets using the app from your device at scan entrances.
- By using Flowte Wallet, you're supporting the Flowte Green Policy to better the environment.
Download from:
Contact Tags & Promos
Contact tags have some useful & often powerful uses in Flowte. These can include marketing list creation, special discounts and automations. This guide cover some basic use cases, however all of these can be combined to create a unique sales experience.
1. Contact Tag Creation and Editing
Fan Engagement > Contacts
When you're on the contacts page, you will notice you can search based on the tags a contact has. You can have these added automatically or you can manually add them.
Manually Editing Contact Tags
1. Edit a specific contact record.
2. When in the record click on the Tags input. You can select a tag from the dropdown of existing tags, or start typing to find one. If it doesn't exist already, you can click "enter" to create it. When you do it will ask if you want to set the "days until expiry", this allows the tag to automatically be removed from the contact x days after it is added. If you don't want it automatically removed, leave this blank.
3. You have now set the tag for the contact.
4. Any automations that trigger on the adding of a tag will now trigger.
Automatically Adding Contact Tags
Retail & Hospitality > Offers
You can set a rule that will automatically give users a tag based on what they buy. This can be done based on sale of a specific booking or even the individual ticket type.
Booking Sale
1. Set an offer name.
2. Tap "If Booking Category Is".
3. Tap the tag you want the rule to work based on. Tap the "new" button if needed
4. Tap the option "then".
5. Tap "give the customer the tag".
6. Set the tag you want to automatically assign on purchase of the booking with the tag from step 3.
7. Go to the Ticketing > Bookings > Booking Info > edit booking(s) > set booking category to tag set in step 3.
8. This will now automatically give anyone who buys the bookings the tag you set in step 6.
Ticket Sale
1. Set an offer name.
2. Select "If a ticket sold with tag".
3. Select the tag you want the rule to work based on. You can create a new one by tapping the "new" button.
4. The option "then" will automatically be selected.
5. Select "give the customer the tag".
6. Select the tag to assign automatically when they purchase the booking with the tag from step 3.
7. Go to the Ticketing >Bookings section > Booking Info > View Times and Prices.
8. Edit any ticket type(s) and set the ticket tagto the tag you set in step 3.
9. This will now automatically give anyone who buys the tickets the tag defined in step 6.
2. Marketing With Contact Tags
A great way to make use of the contact tags is to automatically add the customers to your marketing lists. As covered above, as this is automatically done you can have campaigns sending long after you set them up making marketing so much easier.
List Building
Marketing > List Builder
Create a new list by including the rule "contact tag" to one that you have added automatically to customers above. This means that every time the rule is run the contact will automatically be added to the list you are building now. This means you can always have the most up to date information for campaigns.
Sending Automated Emails
Fan Engagement > Automation
If you want to send a campaign automatically to new contacts with a particular tag see below:

You will need an email campaign already created, if you aren't sure how to do this you can view or guide on:
1. Click Add Workflowte.
2. Set a workflowte name.
3. Set the trigger type "Time after tag added to contact".
4. Select the tag you want to trigger the rule.
5. Set the number of minutes / hours / days / weeks / months after tag assigns for the rule to trigger.
6. Set "send email to contact" to automatically send the campaign to this contact.
7. You can also set it to be sent to your own email if you just want to be notified when the action happens.
8. When you create this rule it will now trigger when the tag is automatically or manually added to the contact.
3. Special Offers With Contact Tags
Another powerful way to make use of contact tags is to provide special prices and offers based on who has the tag. This can then be combined with the automated campaigns to get additional sales from existing customers. This will allow them to get this offer online when they log into the storefront at the time of a sale.
Discounted Bookings
Retail & Hospitality > Offers
You can set a rule that will apply a discount to any contact that has a particular tag for bookings that have a particular category set.
1. Set the offer rule name.
2. Set "If booking category is".
3. Set the booking category that will allow the rule to work, you can limit which bookings the discount is applied
4. Select "and".
5. Select "if someone has the tag".
6. Select the contact tag that you want the rule to be based on.
7. "then" should be automatically selected, select the rule "apply the discount".
8. Set a discount rule, you can create a new discount by clicking on the blue "New" button.
This means that when someone with contact tag x (step 6) tries to buy booking y with the booking category set in step 3 they will get the discount set in step 8 automatically.
Ticket Types
Ticketing > Bookings
You can have specific ticket types that are only on offer to people with a specific contact tag. This can be great to build additional rules on top of your existing rules such as with membership schemes, etc.
Note: this can be set at creation too by editing the ticket details in the same way though we will cover it as part of an edit in this example but the process is the same
1. Select and booking to edit, then navigate to a specific date time in the bottom left of the screen.
2. Open up the section the ticket type is in or you want to add to.
3. Add a new ticket type or edit and existing one. Click on the cogwheel for the ticket
4. This will open the detailed settings for this ticket type.
5. In settings you will find the "Contact Tag" setting, this will allow you to select a particular contact tag.
6. This means that only people with this contact tag can see and purchase this ticket type.
5. Click save at the top of the page to set the rule.
Now a contact can purchase this ticket type online and only if they have the tag. You could also based on this tag automatically send them an email telling them of this offer as per the rules above and also have this automatically be given when they buy something else such as a membership or similar item. As you can see, there are countless ways you can make use of these rules and layer them to create very successful campaigns to get your customers excited about your upcoming bookings.
Season Tickets
As per the steps outlined above, you can also set this rule on the season tickets by setting the same Contact Tag rule against the season ticket type within your season pricing booking. This will allow your customers to get a different prices / named season ticket in the same way they can individual booking ticket types.
Merge & Purge Duplicate Contacts
This guide outlines how you can edit and delete duplicate contacts.
Step 1: Find Duplicate Contacts
1. Navigate to Fan Engagement > Contacts. Review your database for any duplicates.
Step 2: Move Transactions To Correct Contact:
1. Before you begin you will need to move any transactions from the duplicate contact to combine all
their orders into one record.
2. Navigate to Fan Engagement > Contacts > Select the Edit button beside the contact
3. Select a transaction.
4. Your transaction will appear.
5. Tap Change Contact (top right). Select the contact to move the transactions to.
6. Search for the contact you want to move the transaction into.
7. Click the edit button beside the contact you you want to move the transaction to.
8. Click Save Contact.
Step 3: Removing the "old / legacy" contact
1. Select the duplicate contacts.
2. Click the blue Edit button on the contact. The following page will appear.
3. In the top left hand corner, click the red Remove button.
Step 4: (optional) Cleaning up contacts with poor quality data
1. You can edit & save changes to contact records on the contact information page.
Multiple Contacts Per Order

Benefits:
1. Marketing & Fan Experience capture details for every attendee & encourage repeat business.
2. Security > validate each ticket at point of entry
Enable Multi Contacts For A Specific Booking
1. Navigate to Ticketing > Bookings > Booking Name > Multi Contacts > Select "Yes" and save
2. Your customers can now enter contact details for each ticket per below. There is also a copy option.
3. When finalised, the details of the ticket customer will be printed on the tickets.
Enable Multi Contacts For Season Tickets / Packages
1. Navigate to Retail & Hospitality > Offers > Multi Contacts Column > Click "Enable".
2. Now when a person tries to purchase more than one package contact details will be required for each.
Group Contacts By Email
You can activate this feature through the settings menu, as illustrated in the screenshot below:
Once activated, this feature streamlines contact management by automatically updating existing contacts rather than creating duplicates when users add additional surnames, as long as they are using the same email address. For instance, if a contact named Cherry Pie adds "Apple" as an additional last name during a transaction, the system will seamlessly update the contact to "Cherry Apple Pie." Consequently, all transactions will be consolidated under this single contact entry, eliminating the clutter of duplicate contacts.
If you choose not to enable this feature, the system will continue to function as it currently does. This flexibility ensures that users without email addresses can still make purchases using alternative methods, such as a parent's email address.