7 | Affiliate URL
Affiliate URL Steps:
Step 1:
Navigate to Admin > Preferences > Settings, then click on Add Affiliate.
Adding Commission Per Affiliate
To add a commission per affiliate, click on Add Affiliate, set the custom commission rate, and save the changes.

You can choose to set a commission as either a fixed amount or a percentage. If you prefer a percentage, enter 0 for the fixed amount. If you want a fixed amount instead, set the percentage to 0%.
Step 2:
To get the Affiliate URL for bookings:
Go to Storefront > E-Commerce > Bookings, select the desired Affiliate URL from the dropdown menu, and then click on Booking URL to generate it. You can then copy and paste the link displayed, as this will be your Affiliate URL.

Get the Booking Time URL:
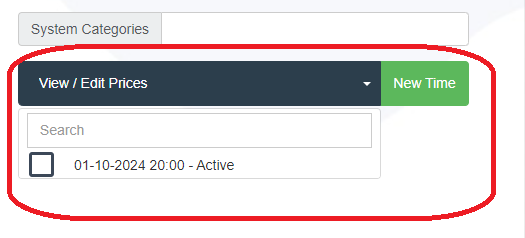
In your event, go to View/Edit Prices, click on the date and time of your choice, select the desired Affiliate URL from the dropdown menu, and click on Booking Time URL. You can then copy and paste the displayed URL, which will be your Affiliate URL.

To get the Affiliate URL for products:
Storefront > E-Commerce > Products > Select the desired Affiliate URL from the dropdown menu, and then click on Product URL to generate it. You can then copy and paste the link displayed, as this will be your Affiliate URL.

Storefront > E-Commerce > Products > Select the desired Affiliate URL from the dropdown menu, and then click on Product URL to generate it. You can then copy and paste the link displayed, as this will be your Affiliate URL.
To get the Affiliate URL for a bundle:
Storefront > E-Commerce > Bundles > Select the desired Affiliate URL from the dropdown menu, and then click on View to generate it. You can then copy and paste the link displayed, as this will be your Affiliate URL.

Storefront > E-Commerce > Bundles > Select the desired Affiliate URL from the dropdown menu, and then click on View to generate it. You can then copy and paste the link displayed, as this will be your Affiliate URL.
Step 3:
Add Your Affiliate URL Button:
You must add a button on your website that links to your Affiliate URL. This is essential for effectively directing traffic to your site and accurately tracking your sales.
Access Affiliate URL data in reports:
Orders Report:
To view data from the various Affiliate URLs used, go to Analytics > Reports > Standard Reports. Select your desired transaction date, choose Affiliate under Column Visibility, and the results will be displayed in the report under Affiliate.
E-Commerce Report:
Go to Analytics > Reports > Standard Reports > E-Commerce Report. Select your booking and scroll down to the Affiliate section of the report to view the results.

Use Case: Tracking Sales from Different Promoters with Affiliate URLs
Scenario: An event organizer wants to use multiple promoters to sell tickets for an event and track who drives the most sales. By assigning each promoter a unique Affiliate URL, they can see which customers purchased through which promoter.
Solution:
Create Affiliate Profiles:
The organizer creates an affiliate profile for each promoter by going to Admin > Preferences > Settings and clicking on Add Affiliate.
Generate Booking URLs:
To generate a unique booking link for each promoter, go to Storefront > E-Commerce > Bookings, select the promoter's Affiliate URL from the dropdown, and click Booking URL. Copy and send this link to the respective promoter.
Track Sales:
When customers purchase tickets through a promoter’s Affiliate URL, their sales are tracked. The organizer can view performance in the Orders Report and E-Commerce Report, which display sales and revenue per promoter.
Benefits:
- Clear Tracking: Identify which promoter drives the most sales.
- Reporting: View detailed sales data in both the Orders and E-Commerce reports.
- Scalability: Easily manage multiple promoters while tracking performance efficiently.
This approach enables the organizer to track sales effectively and reward promoters based on performance.